
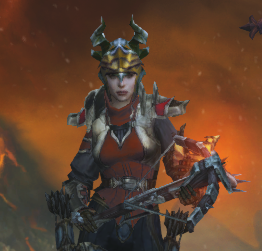
This is the first version of my Demon Hunter Leveling Guide. Updated for Patch 1.0.2 on 5/29/2012. Look for big updates to the leveling portion soon! Once completed it will include how and why to build, configure, gear and play your Demon Hunter as well as how to level from 1 to 60.
Getting Started
So you decided to level a Demon Hunter. That’s a good decision. It’s one of the most enjoyable classes to play but I won’t pretend it’s the fastest to level. If you have friends with higher level characters they will always be able to help in someway. Invite them to join you and thank them for coming. If you decide to play solo be very mindful of your build. Read the build section below and always try new skills when they become available. The tooltips don’t always explain how they work and more often than not the tooltips are actually somewhat misleading. I could give you an example of that but I won’t bore you. Before we get started with leveling lets take a look at Demon Hunter strengths, weaknesses and then how to configure, equip and play your Demon Hunter.
Demon Hunter Strengths
The Demon Hunter is an incredibly versatile class capable of doing extremely high damage per second in groups while also managing to solo without doing damage. One of its main solo play styles is kiting, which is the use of snares, immobilization and knock backs to evade enemies while also doing damage to them while moving. If you play a Demon Hunter solo you will learn to maneuver and pay attention to things on the screen that you normally might ignore in other games. If you want to reach level 60 fast you’re going to want to utilize a combination of coop groups and solo play. Coop groups tend to be a little slower through some areas but much faster during boss encounters. I spent over 12 minute fighting Diablo on Nightmare difficulty but when I joined a coop with a Monk the battle couldn’t have lasted more than 3-4 minutes.
The Demon Hunter is also a promising Hardcore class because it’s already equipped with an array of survival and mobility abilities. You can usually get out of most situations by burning Preparation and then Vaulting out of harm’s way at any given time. You can also stack Vitality and create a massive buffer for mistakes. I won’t talk too much about Hardcore Demon Hunters but I’ll explain some of the build options below.
Demon Hunter Weaknesses
The Demon Hunter has its down sides. You don’t get to dive into battle and smash things to pieces like you might with a Monk or Barbarian. You have to be very watchful, looking for special attacks from mobs and evading them before they reach you. Ensuring that you don’t Vault into the wrong group, and pull certain mobs aside to kill them before you go ahead. Solo’ing can get arduous if you’re an impatient person or unwilling to experiment with new skills.
You will probably end up using abilities like Caltrops more than you’d have thought. You might find yourself with a very limited array of DPS abilities at hand since you invested in survival abilities instead.
Demon Hunter Abilities / Skill Progression
As you level you’re going to unlock new active and passive abilities at each level. I recommend you experiment with new abilities as often as possible so that you have a broad understanding of how the class works. If you just run with the first abilities you pick for each slot you’re going to gimp yourself later on. You won’t be flexible, you won’t know what changes you can make, you won’t know what changes you should make, you’ll sit there with a crappy build and get rocked by champions. Here is what you can expect while you level:
Demon Hunter Passive Skills

The Demon Hutner has 15 passive abilities, at level 10 you get to pick 1, at level 20 you get to keep 2 and at level 30 you get to keep 3 of these. Each passive ability can be thrown into a category for either survival, damage, farming or a hybrid of damage and survival.
Survival Passives
Tactical Advantage. This is a passive useful for specific survival needs. It’s more of a farming passive if you ask me though.
Thrill of the Hunt: This is an immobilization effect that only happens every 10 seconds. I don’t think it’s reliable enough to use and seems to be more of a filler passive than one I’d actually use.
Night Stalker: Critical Hits give you 1 Discpline. This will increase your discipline depending on your critical chance. Discipline is used to get away from the enemies so I’ve got this as a survival passive but I can’t think of a situation where I would give this one of the 3 spots.
Brooding: This is a health regen ability (1% every second as long as you haven’t been hit in 3 seconds). This is a really good passive for hardcore players.
Numbering Traps: Reduce damage from enemies who were hit by Fan of Kinves, Spike Trap and Caltrops. This is another pure survival passive.
Perfectionist: Decreases Discipline cost of all abilities by 10%. This will allow you to Vault, Caltrop, etc more often allowing you to survive in sticky situations.
Custom Engineering: Doubles the duration of Caltrops, Marked for Death and Sentry. I’m not sure why it’s hard to just recast these? This passive definitely won’t get my attention.
Damage Passives
Steady Aim: Within 10 yards of your enemies you gain 20% damage. This is a pure damage increase. But as you’ll see it might not take priority over some others to get a spot.
Archery: Crossbows: + 50% Critical Hit Damage, Bows: 15% Increased damage and Hand Crossbows: 10% Critical Hit Chance. This adds massive damage per second when used with 2H crossbows and high crit chance.
Grenadier: This is definitely a very situational / build specific damage passive.
Sharpshooter: This is a solid damage passive, increasing your crit the longer you go without a crit. It doesn’t unlock until level 50 though.
Ballistics: This is another situational / build specific damage passive.
Hybrid Survival / Damage Passives
Vengeance: This gives you 25 Hatred and 2 Discipline when you pickup a Health Globe. I use this ability very often since it helps maintain high discipline, which is primary a survival resource, and also gives you more damage in the form of a few more Chakrams or whatever you’re using to deal damage.
Cull the Weak: Increases damage to enemies that are snared. This is a very situational passive I wouldn’t use unless your serious about snaring everything in sight and don’t have another passive to use in its place.
Farming Passives
Hot Pursuit: The only reason I can think of wanting a 15% movement speed (only when you have max hatred) buff is if you’re farming.
Elective Mode

I gave this its own section because a lot of players gloss over the words ‘elective mode’ and don’t really let it sink it what it does. The best way to understand it is to enable it regardless of whether you intend to use it or not. You can do that by going to Options -> Gameplay and checking the box to enable Elective Mode.
Elective Mode lets you use just about any active ability in any active ability slot. For instance, you could use an Archery skill in your Secondary skill slot (right mouse button). You could use more than one Defensive skill as well, putting one in the Defensive skill slot and another in the Hunting skill slot. I use both Vault and Preparation even though some players might not be able to figure out how to use both at the same time. Enable elective mode whether you plan to use it or not.
Demon Hunter Builds
As with all classes there are practically an infinite number of build combinations. You can take any build that someone recommends to you and make a small change to it and likely be the only person that has ever used that build before. There are also 4 or more play styles right now in the game: solo, coop, hardcore and farming. Below are my favorite solo and favorite coop builds. I’ll explain how to use them against bosses in the leveling section of this guide.
Chakram / Caltrops / Vault / Prep build (solo build)

This is a solo build that utilizes Chakram as the main damage ability. To be specific: Chakram with Razor Discs. This offers the highest damage output per Hatred spent available for a damage dealing ability. Even though it has relatively low DPS compared to something like Impale with Chemical Burn it is still the secondary of choice because it offers massive flexibility (easy to aim) and massive reuse (only costs 10 Hatred instead of 25 as Impale does)
Speed Difference Between Impale and Chakram
Generate Hatred with Entangling Shot with Justice is Served. Although you can be flexible with this ability and passive. I like having a backup snare if everything else is down and I feel like JiS will amplify the primary purpose of the ability as it increases the Hatred regeneration.
For survival, I utilize Caltrops with Torturous Ground, Vault with any skill rune and Preparation with Battle Scars. This allows me to trap and jump away from enemies. The immobilizing trap is extremely helpful as is the heal that you get with Battle Scars. It acts as a second heal when your potion is on cool down.
Finally, I utilize Rain of Vengeance with Stampede since it is capable of causing massive knock-back effects across the screen. This is essential for when things get “out of hand.”
This build is very flexible and doesn’t require any specific passives. Although I usually have Archery, Sharpshooter and Vengeance. Vengeance is my favorite since it gives me another source of Hatred regeneration.
You can see this build here: http://us.battle.net/d3/en/calculator/demon-hunter#beYdVl!bTe!YbZZbb
Rapid Fire / Bola Shot (coop build)

I definitely play more solo than I do coop so there is still a lot of experimenting to do with coop builds. What I have found to be the most effective is to use Bola Shot with Volatile Explosions (increased radius) and Rapid Fire with Withering Fire (decreased initial Hatred cost) This combination allows you to do a lot of damage regardless of your hatred status. I’m unsure whether or not Chakram will beat out Rapid Fire or not, either way Entangling Shot has little purpose in coop games.
I drop Caltrops and Prep for Smoke Screen and Marked for Death. Smoke Screen lets you drop your aggro and get out of harm’s way. Marked for Death with Valley of Death is a cool way to increase the damage your party deals to a group of enemies. It’s definitely better than Preparation which you shouldn’t need in a good coop group. Any skill rune works well for Smoke Screen but I’ll take Breathe Deep for Hatred regeneration.
I’m unsure of my #3 ability but I’m sticking with Fan of Knives for now with Hail of Knives. Rain of Vengeance still works great in coop games. Stampede knocks back most enemies making many situations more manageable.
As far as passives I’m still using the same passives mentioned above. Vengeance for more hatred and Archery for increased critical hit damage. Brooding could replace Sharpshooter if I feel the need to self regenerate HP. It depends what the group is, if I’m playing with Monks who use healing mantras I’ll keep Sharpshooter.
You can see this build here: http://us.battle.net/d3/en/calculator/demon-hunter#WcXjhl!bde!aabZbb
Demon Hunter Stats
 Demon Hunters depend on Dexterity for damage. They share this stat with the Monk so the gem of choice on most gear is the Emerald. But don’t forget about Vitality. You can run through Normal mode without worrying much about your gear (unless you’re playing Hardcore) but once you enter into Act I or Act II of Nightmare you’re going to want to adjust your gear so that you have some HP.
One of the biggest mistakes new Demon Hunters make is completely ignoring their health bar. I started running Nightmare with a ratio of about 1 Vitality to 3 Dexterity but ended with about 1 Vitality for every 2 Dexterity. By the time I entered Hell I had nearly a 1 to 1 ratio but I backed my Vitality down a little bit because I felt like my damage was being unnecessarily gimped.
Demon Hunters also benefit from +Critical Hit Damage. You can find this on rings and it is more powerful than the typical + Damage modifier that many players are using to level. If you use Crossbows with the Archery passive you will receive a +50% Critical Hit Damage buff which will send your tooltip DPS up significantly. You can find even more Critical Hit Damage from Emeralds inserted into socketed weapons. That’s why when I search for equipment for my Demon Hunter I always look for bows that have a socket. You can raise your Critical Hit Damage so high that you’re doing massive crits with skills like Impale.
Finally, and this isn’t in any special order, +Attack Speed is also another crucial stat. I try to get this on all of my weapons since it increases damage considerably and actually makes your attacks faster so that you can do more of whatever you do best in game.
Weapon Attack Speed
There is a stat on each weapon called “Attacks per Second.” This has a significantly impact on your play style. It doesn’t just determine how many times you can attack per second, it also determines how soon after you use an ability you can move your character again. This is important if you’re kiting so I definitely enjoy playing a character with a high attacks per second, above 1.40 IMO. However, the draw back is that each of your attacks does slightly less damage and you’ll be using Hatred faster. I think it’s worth it though since you will also be able to generate Hatred faster and your damage output will be more consistent instead of a bunch of burst attacks where much of your damage output might go wasted.
1 Handed or 2 Handed, Shield, Dual Wielding or Quiver?
So what’s the deal with 1 handed crossbows, 2 handed crossbows, 2 handed bows, quivers and shields? 1H Crossbows are faster so they make your damage output more consistent. You can also dual wield 1 handed crossbows. 2H crossbows are what I used most often while leveling because of the + Critical Hit Damage a long with the high availability of stats and base DPS. You can use a quiver with 2 handed weapons, but you can’t use a shield with them. So a 2 Handed Crossbow + Quiver was my combination of choice.
What you decide to go with should be based on what’s available in the auction house or what you find in game. If you’re playing a hardcore character you should consider bringing a shield, at the cost of your DPS, when you’re alone in Hell & Inferno. Otherwise, check for the best stat combinations that are available and go with that.
Gearing up Your Demon Hunter
Gearing up your Demon Hunter is easy once you understand the stats. Dexterity, Attack Speed and +Critical Hit Damage for DPS and +Vitality, Life, Life Steal and Movement Speed for survival (some of which are mentioned above in more detail). Some players avoid the auction house and try to take a purist approach to leveling. That’s fine but you will struggle in the later half of Nightmare, all of Hell and certainly all of Inferno. If you take this approach, check every vendor as often as possible for upgrades. Upgrades come for between 3,000-7,000 gold most of the time. I played with vendor rings for a very long time and they worked great.
If you decide to use the auction house you need to use it properly. To search for gear start by selecting the gear slot you want to upgrade, enter some low stat requirements and then enter a max-buyout of about 30,000 gold. It’s not that you want to spend 30,000 gold, you just want to make sure that there are less than 46 pages of results. If there are more than 46 pages you won’t be able to find the lowest available buyouts when sorting by buyout since they will lost between the N/A buyouts and the high buyouts. If you don’t understand what I’m talking about right away, don’t worry about it you’ll get it as you upgrade your gear.
Once you do your search with a capped buyout amount, you will be able to search by buyout until the lowest buyouts or no-buyouts are on top. From there, look for items between 100 – 10,000 gold that suit your needs. Chances are you can get considerable upgrades without spending more than 5,000 gold per equipment slot. I also like looking for pieces of equipment that have sockets. Sockets add a considerable amount of dexterity (via the emerald, usually +26+30 are the cheap options). Make sure you factor that into gear with sockets that are not filled.

The most important piece of gear to upgrade is your weapon. This is because at each level the amount of base DPS you can get on your weapon goes up considerably. For example, from levels 25 to 30 you can nearly double your base DPS. The table below shows the max available base DPS at each 5 level increments:
| Level | Max DPS |
| 10 | 24.1 |
| 15 | 29.1 |
| 20 | 30.8 |
| 25 | 32.8 |
| 30 | 53.6 |
| 35 | 72 |
| 40 | 94 |
| 45 | 130 |
| 50 | 192 |
| 55 | 393 |
| 59 | 530 |
| 60 | 1020 |
Imagine if you used a level 40 bow at level 52… you would be severely under geared! You can usually get a high-DPS weapon with decent stats for 20,000-30,000 gold between levels 40 and 60. If you use a set of bracers from level 40 at level 52 you will only be missing out on a dozen or so dexterity, so it’s no big deal. Your weapon is extremely important, make sure you are visiting the auction house and upgrading is regularly. I recommend searching for a weapon with sockets, with dexterity, with vitality and/or with attack speed. I then search for the highest available DPS and go with something near the top with that criteria.
Gems for Demon Hunter
Once you start filling your gear slots you’re going to have open gem slots. This is how I decide what gem to put into a piece of gear:
- Helmet Slot: Do you die really often? Then use an Amethyst (+ life). Otherwise use a Ruby (+ experience)
- Weapon Slot: Do you die really often? Then use an Amethyst (+ Life Steal). Otherwise use either an Emerald (+ Critical Damage) or Ruby (+ Damage). * The Emerald is usually better for the Demon Hunter.
- All Other Slots: Are you dying a lot? Then use an Amethyst (+ Vitality). Otherwise use an Emerald (+Dexterity and therefore more damage).
That’s a pretty solid way to decide. For the most part you’re stacking Emeralds and the only decision you’re making is whether or not you should put an Amethyst or Ruby into your helmet. The Ruby will speed up your leveling while the Amethyst will keep you alive. Every time you die you have to spend time running back, so if you can stay alive without the Amethyst there, use the Emerald, otherwise throw the Amethyst in for a +11-15% Life bonus.
What quality gem should you use? If you’re strapped for cash just use Square Emeralds or Flawless Square Emeralds. These are the best bang for their buck at the time of writing this. Whatever you do don’t combine your own gems with the Jeweler. Unless Blizzard has fixed this by the time you read this article, this is a great way to lose money. Just sell your low quality gems on the auction house (or maybe even the vendor) and buy higher tiered ones. You will save gold this way and be able to buy more good stuff.
Demon Hunter Follower
I’ve seen Demon Hunters play with Enchantresses, Scoundrels and Templars. I don’t think you can really go wrong with any of them but I’ll tell you that I prefer the Templar because of their abilities. The Templar will heal you, charge and stun enemies, increase your life regeneration and come to your aid when your health is low. He’ll also distract or “tank” enemies while you’re dealing with others. If you don’t play with a follower you’re going to have a much harder time leveling. Here is the spec my Templar rolls with:

* If you want to respec/rebuild your Templar, hire him, right click his portrait and select “Retrain.” His abilities will be cleared and you will be able to reselect them.
How to Stay Alive
Staying alive is going to depend on the build you end up using. I personally utilize Caltrops Vault and Entangling Shot regularly to keep my distance from enemies. I also utilize Preparation to offer me a secondary heal to my potions and a way to restore all of my Discipline so that I can get out of dodge if I need to. Throughout this guide I’ll explain how Smoke Screen, Shadow Power and even Rain of Vengeance (with Stampede) can keep you alive.
Kiting
I’m going to talk a lot about kiting throughout this guide. The best way to explain how to do it is with some videos:
Kiting Plagued Descecrator Fire Chains in Act I Hell
Kiting Frozen Waller Teleporter in Act I Hell
Kiting Extra Health Reflects Damage Fast in Hell
Kiting ?? – Death! in Hell
How to Kill Certain Elites, Rare Packs and Champions
There are a few boss modifiers that are particularly difficult for the Demon Hunter. Each class has to deal with these differently but here is are some tips for each modifier:
Arcane Enchanted – This is pretty easy to avoid as a Demon Hunter. Just pay attention to where the orbs go down and get away from them BEFORE they start to rotate.
Desecrator, Frozen, Molten, Plagued – These four abilities are immobile ground effects so they should be easy to avoid as a Demon Hunter.
Electrified – Keep your distance from the enemy since the electric pulses are further away from each other as they go outward
Fire Chains (Rare Packs only) – Keep the group together to avoid getting caught between any of them. If you’re playing coop you want to do the opposite if possible, separate one and bring it away from the melee classes so that they can do melee damage to the other.
Illusionist – Use an ability like Chakram to take out the illusions first.
Invulnerable Minions (Elite champions only) – This is the most challenging modifier to deal with. You have to focus on the elite (yellow) target. Sometimes the best way to deal with this is to leave the game and come back ![]()
Jailer – This is one of the hardest for Demon Hunters because it puts us in a position where the enemy can hurt us really badly. If you’re fighting a Jailer save your potions and Preparation for when you’re jailed. I know that’s easier said than done, just be more careful when you’re NOT jailed so that you can save yourself when you ARE.
Mortar / Grenadier – This is another pain in the ass for Demon Hunters. You have to keep moving but you need to stop moving to attack. You have two options here. You either take it like a champ by standing there and trying to burn down the enemy, or you switch to an ability like Impale that does high burst damage.
Reflects Damage – Watch carefully for the shield to come up and when it does stop attacking.
Waller – Just keep running! You’ll often get trapped inside a u-shaped wall. This is where Vault really comes in handy.
Vampiric – You might need to drop your follower. Watch the enemies health bar carefully and if it’s going up to fast drop your follower.
Vortex – Deal with this one the same way you deal with Jailer. Save up self-heals like your potion and your Preparation. This is another place where Vault comes in handy.
Normal
Normal will last you from levels 1 to 30 or perhaps level 32 depending on whether you use a Ruby in your helmet. Here are some general leveling tips to help you get started leveling fast:
Leveling Tips
- Check vendors for upgrades as soon as possible. You can jump right up to 15-20 dps. Otherwise you will be waiting for random drops which can suck.
- Tap ALT to see items that have dropped.
- Tap V to see enemy health bars (this only shows enemies that you have hit at least once)
- Tap ESC when quest dialogues come up to pass by them (this works for cinematics too, but you might enjoy them if it’s your first time through)
- At level 15 you can get a Socketed Arming Cap off the auction house for a few hundred gold. Throw the nicest Ruby you can afford into it (Flawless Square Ruby) and this will give you 10-20% more experience per kill.
- As you level, look for items on the auction house with a max buyout of 2,000-3,000 gold. Revisit the auction house every few levels to keep your character decked out in the fanciest stuff. This will help immensely and get you to level 30 faster than you thought possible.
- When casting a lot of ranged spells, hold the SHIFT key to ensure you don’t miss click and end up sending your character closer to them. When you hold shift, it guarantees your character will shoot whatever it is you told it to in that direction. It will probably still hit the enemy.
Act I
Act I Skeleton King on Normal (level 8)
You have two choices for skill here, either Hungering Arrow or Entangling Shot and Impale or Rapid Fire. It doesn’t really matter although I prefer Hungering Arrow because it does more damage and snaringn targets isn’t important and Impale since it also does more damage. Use Caltrops to snare the skeletons if they give you any problem. You can circle the entire room, down the stairs and then back up the stairs to keep the skeletons at bay. They move really slowly.
If you have problems with the Skeleton King consider checking the leveling tips above. The most important at this point would be that you go to the vendors in Tristam and look for upgrades. If you’re still having problems hop on the auction house and look for some upgrades.
Act I Butcher on Normal (Level 13)
The Butcher is the first real fight you’ll encounter and it’s a good idea to pay attention so that you will have less problems when you reach the Butcher on Nightmare, Hell and Inferno. He has a few tricky abilities that are either tough or impossible to avoid.
- Grappling Hook – He points before he throws it. Get out of the way or you lose 1/3 to 1/2 of your health (you’ll die in later difficulties).
- Fire breath – He holds still for a split second before he spits. It doesn’t do enough damage to stop moving for but he will charge immediately afterwards.
- Multiple Chains – Impossible to avoid.
That’s really it. Get out of the way of those and stay off the firing grates and you’ll survive.
To default the Butcher with my level 13 Demon Hunter I used Hungering Arrow with Puncturing Arrow because it does more single target damage. I used Impale with Impact which does a high amount of burst damage. I used Smoke Screen as an ‘oh shit’ button in case I got cornered somewhere that I couldn’t get out of the way and Vault to jump over fiery grates and get out of the way of grappling hooks that I wasn’t paying attention to.
You might have a hard time with the Butcher especially if this is your first ranged character. You will need to move around a lot, attack at the right time and get the hell out of the way of several of his deadly abilities. Fortunately there is a lot of room for error since he doesn’t take off that much damage when he hits you anyways.
Act II
At the beginning of Act II you might notice the difficulty get stepped up a little bit. The first thing you should do is check your gear at the vendors, look for upgrades. Make sure you have rings and amulets for both you and your follower. As soon as you reach level 15 grab a helm off the auction house with a socket and put the best Ruby you can find into it. This will give you 19% or higher experience per kill. This will give you several level bonus on the bosses from here until the middle of Hell when you would have otherwise hit level 60 (you’ll hit it much sooner with a ruby in your helm).
Belial on Normal (Level 23)
You should be level 22 or 23 when you reach Belial. As ranged you can just stand over on the right side and attack until the meteor zones show up on the ground.The same meteor zones (or shadows) show up before he does his melee attack and when the actual meteors strike. This encounter is as simple as avoiding those zones. As you can see in the Wizard video below, the only time you’ll get hit is when you stand in one of those shadows too long. Don’t stand on the left side, if you do he will raise his body up and you won’t be able to see meteor zones/shadows on the ground ![]() . I’ve done this in coop and died.
. I’ve done this in coop and died.
To make the adds phase a little easier I used Entangling Shot, Chakram and Caltrops. These three abilities will work good on Belial’s demon form as well (since Chakram has a great Hatred->Damage conversion). I kept Vault for the meteor phase, multishot for extra damage and Marked for Death to increase my overall damage against Belial. I kept the Vengeance passive to give me an extra Hatred heal mid fight and Steady Aim to buff my damage, since I should be within 10 yards of everyone the whole time.
This is the build I used for Belial on Normal: http://us.battle.net/d3/en/calculator/demon-hunter#beYdjQ!bY!aaZa
Overall if you have a problem on Belial just try it again, if you keep having problems something is seriously wrong with your gear. It will get more challenging to solo in Nightmare.
Here is my wizard killing Belial. The ranged strategy is exactly the same.
Act III
Azmodan (Level 30)
Azmodan is one of the easiest bosses on Normal difficulty, especially with a ranged class. He has only a few abilities that you need to be concerned about. First, he launches a giant fire ball at you. It moves very slowly and is easy to avoid, but if you don’t avoid it you will probably be killed instantly (I don’t know, because I didn’t let it hit me). He also creates giant black void zones that expand outward. They don’t do a lot of damage but are also easy to avoid. He also does an AoE rain of skeletons ability. The area that is about to be effectived lights up temporarily and then the skeletons start to rain. You usually have enough time to get out of the way or at least to the edge so that the damage is greatly mitigated.
You may also see some adds, but this isn’t a big deal on Normal difficulty as they die in a couple of shots. Finally, near the end of the encounter he will use a fire laser on you that is also very easy to avoid.
The trick to defeating Azmodan with a Demon Hunter is to avoid these abilities and focus Rapid Fire on him when you have a chance to hold still. I used a variant of my normal leveling build which includes Entangling Shot, Rapid Fire, Shadow Power, Vault, Bat Companion (for Hatred regen) and Rain of Vengeance. If you’re not level 30 yet you can use Multishot. Vengeance, Steady Aim and Archery give me some nice damage bonuses along with more Hatred when/if health globes appear.
Here is how the ranged strategy works against Azmodan. You’ll see me here killing him with my Wizard. The same applies for the Demon Hunter except use Rapid Fire:
Act IV
Izual (Level 31)
Izual is surprisingly challenging considering how easy Azmodan was. You will also have faced Rakonoth before you reach Izual but I didn’t find him challenging or important enough to mention here (on Nightmare he gets pretty rough). The same basic strategy applies against Izual except you may want to use Bola Shot with Volatile Explosion for the adds and Twin Chakrams for added on-the-move damage. You may also swap the Bat Companion out for a Sentry with Spitfire Turret to do damage to Izual and his friends while you’re dodging his frozen orbs. Finally, grab Smoke Screen in case you get slowed and Izual catches you.
Again, I don’t have a video of my Demon Hunter killing Izual so my Wizard video will have to work for now. The same basic strategy applies just with the Demon Hunter’s abilities:
Diablo (Level 31)
Diablo poses another threat to your progress to level 60, but since it’s just Normal difficulty it should be relatively easy to overcome. Diablo has a few abilities that are particularly annoying for a Demon Hunter. He sends a fireball at you which will explode into a circle of fire, he sends out fireballs in every direction (easier to avoid the further you are away), he teleports at you, he runs you down and he creates prisons from the ground (also easy to avoid). In phase 2 you will have to fight your clone, who is easy to dispatch and usually gives you a health glove in return and in phase 3 he steps up the intensity but uses the same abilities in phase 1 with the exception of a new lightning breath he casts across everything in front of him.
To counter these abilities I recommend using Smoke Screen (for when he teleports on top of you) along with Vault to get out of the way when he teleports on top of you or when you need to get out of the fire. Use the health wells on the left and the right of the screen as a sanctuary for when you are weakened. Impale with Chemical Burn helps do quick burst damage to Diablo when she lets you stand still to do so. Sentry is also good since you can put it down in the middle of the area and it will attack whether you’re dodging things or not. The Bat Companion will give you more hatred to cast Impale.
This is a very kite intensive fight but it’s made easier by, most notably, Impale, Vault and Smoke Screen with Lingering Fog. Here is my Nightmare encounter with him, keep in mind I’m using Chakram with Razor Discs which isn’t available to you at level 31:
If you’re having problems with Diablo I can almost guarantee it’s because of your gear. You should have a minimum of 2,500 hp and a minimum of 400-500 base dps.You can get gear that will accomplish this for you on the auction house for a very small amount of gold.
Nightmare
Once you arrive in Nightmare difficulty you will notice the difficulty step up a little bit. You might even struggle with a few rare packs but a solid Caltrops, Vault, Preparation, Chakram build will help a lot. At level 34 you will unlock Chakram Razor Disc, which I recommend you use for the long haul. There are certainly other play styles that are similarly effective, this one worked fantastic for me so it should also work for you. This is also about the time you will benefit from swapping your Amethyst out of your weapon and throwing in an Emerald instead. Keep the ruby in your healm though since it will give you several levels of advantage over most bosses (you can swap it out for boss fights if you want).
Act I
The first challenge in Act I will be the Skeleton King, who may even be easier to kill than he was on normal difficulty. The reason being, now you have better gear, more abilities and a better idea of how to play your class. Even though you will still be level 32 you can still use Chakram but Rapid Fire with Smoke Screen will also work for doing damage on the King.
The Butcher – Nightmare (Level 37)
You should be able to plow through all of the non-elites, one-shotting just about everything with a white name plate. For the Butcher himself you can use the same build you leveled with except yo might want to swap out Chakram for Rapid Fire with Withering Arrow (http://us.battle.net/d3/en/calculator/demon-hunter#acXdVl!bYe!ZaZaba). I use Smoke Screen on the Butcher to since Caltrops is essentially useless and Smoke Screen gives me just a little bit more defense. Preparation is also helpful especially with Battle Scars which basically acts as a second heal to your potion. Rain of Vengeance with Dark Cloud will do a little bit more damage, you could swap this ability out for something else like Impale with Chemical Burn if you wanted to do quick and high damage on the move.
The Butcher has three main attacks that you will have to deal with:
- Grappling Hook – He points before he throws it. Get out of the way or you lose 1/3 to 1/2 of your health (you’ll die in later difficulties).
- Fire breath – He holds still for a split second before he spits. It doesn’t do enough damage to stop moving for but he will charge immediately afterwards.
- Multiple Chains – Impossible to avoid.
The main thing is to avoid Grappling Hooks, since they CAN kill you. The charge after the fire breath can also kill you. There are healing wells on the left and right to give you an extra way to stay alive. This is a pretty engaging fight, but shouldn’t cause you a problem. If you do have a problem check your gear and consider visiting the auction house again for a few small upgrades. At this point you should have around 750-1,000 dps and around 5,000 health. If you don’t you might be way under-geared.
I did not record my Butcher kill with my Demon Hunter but this Wizard video will show you the same strategy:
The Wizard uses Ray of Frost instead of Rapid Fire and Diamond Skin instead of Smoke Screen.
Act II
Act II is where you might get your first “shock” of difficulty if you’re not ready for it. Usually the challenge can be subsided by visiting the auction house and buying a cheap 2H crossbow with a gem spot, dexterity, + Attack Speed and some other nice stats. If you have pieces of gear with only one useful stat, you can usually replace them with gear with 2 useful stats (like Dex + Vitality) for only a thousand gold or so. You should be approaching or exceeding 1,000 dps and have 4,000 or more health. Any less and you might struggle through Act II.
Belial – Nightmare (Level 42)
Belial is the Lord of Lies but by level 42 you will have well over 1,000 dps and damn near 10,000 hp. The tricky part about Belial is that you have to deal with his add phase where the adds might give you some grief. If that’s the case you can keep your leveling build, which for me consists of Entangling Shot, Chakram (Razor Discs), Caltrops, Vault, Prep and Rain of Vengeance.
This build will also work for the third phase where you face Belial in his full demon form. Chakrams are a little weak compared to Impale with Chemical Burn. You could swap in Impale to either replace Chakram or to replace Rain of Vengeance (bind it to something like CTRL+RIGHT MOUSE) so that you can use it on Belial where you will have an excess of Hatred.
The most damage Belial will do to you is during two different attacks:
- The first one is when he attacks left, right and then center. These are premeditated by green areas on the ground but the third one is the one that does the damage and seems to come in between the first two: bam, bam then BAM. If you get hit by the third one it seems to do 6,000-8,000 damage or so, enough to put you in a bad situation if you don’t have a health potion (which I completely forgot to bring in the video below). Get the hell away from him when he does this and you’ll save yourself the hassle. You will see me get hit with these in the video, I didn’t notice the pattern until I watched it.
- The second one is avoiding the the explosions from the ground. This might seem simple but it’s entirely possible that you get “cornered” and aren’t able to get out of the way of one of them. Having Preparation will give you an extra heal, but if these attacks give you trouble you can also swap in Smoke Screen to replace Caltrops.
This encounter is mostly just practice for Hell mode, where we will have to use a specialized build to take Belial down. To help you visualize the Belial encounter on Nightmare, here is a video of me taking him down with my Wizard using very similar strategies:
Act III (Level 43-48)
Act III might be where you start to meet some tough rare packs and champions. You should have around 10,000 hp and around 1,200 dps. If you’re lacking on gear, head to the auction house and see what you can find. Look for gear with both Dexterity and Vitality, look for a high base-DPS weapon with some attack speed, maybe some experience, some crit, crit damage or anything else that you desire.
At this point in the game I recommend a solid Entangling shot, Chakram (with Razor Discs) build. Caltrops or Smoke Screen, Vault, Preparation and Rain of Vengeance. Something like this build: http://us.battle.net/d3/en/calculator/demon-hunter#beYdVl!beY!abZZbZ The first ability I would scrap is Vault, since it’s used primarily for correcting mistakes and might just be getting you in trouble.
Ghom Nightmare (Level 45)
I confronted Ghom unprepared, I didn’t use a specific build I just used Chakrams and ran him around in a circle. You can tell in this video that I’m over cautious to my own detriment, try not to do that:
Siegebreaker Assault Beast (Level 46)
The Siegebreaker can be a major pain. He does some serious physical damage. Keep him on your screen so you can see him before he charges, stay moving, use AoEs that you can cast on the move and don’t let him catch you. I used my Chakram leveling build in this fight and I handled him rather well:
Azmodan Nightmare (Level 48)
At level 47 Rain of Vengeance’s Stampede skill rune becomes available, this is a personal favorite since it mixes up the chaos by knocking back enemies left and right. As for Azmodan, this is an easy encounter all around. All you need is a solid damage ability, I’ll recommend Impale with Chemical Burn (or even Rapid Fire) instead of Chakram, although Chakram will do the trick too. You’ll want a way to jump around quickly: Vault. A way to go ‘invinsible’ for an instant in case you get in trouble: Smoke Screen. Keep the regular Preparation with Battle Scars for an extra heal and then anything in the last spot. As for your primary ability, it doesn’t really matter you shouldn’t run out of Hatred.
Azmodan hits with 3 major abilities: He creates expanding void zones on the ground that you can easily avoid. He rains corpses over a large circular area, also easy to avoid. He throws a giant fireball at you that will one-shot you, also easy to avoid but also easy to make a mistake on. Avoid these abilities, take out his adds when they spawn and do damage when he lets you hold still and this boss encounter is a piece of cake.
You can see me defeat him with Rapid Fire and a Bat Companion below. This isn’t the best video as it was the first attempt at him and I had only been playing the game for a few days. Obviously Caltrops was useless and Smoke Screen would have been much more helpful:
Act IV
Rakanoth Nightmare (Level 49)
Rakanoth has an ability that teleports him right on top of you and then he hits you for 50-75% of your health. It’s pretty much unavoidable so you need a way to heal yourself. Use Preparation with Battle Scars and Smoke Screen to use in case you don’t have a heal and need to get out of something’s way. You will also need to deal with the adds, Entangling Shot and Chakram will help you do this. You can also use Rain of Vengeance with Stampede to knock back the mobs in case you’re low on health. This fight is about being able to last a long time while also being able to do damage to Rakanoth. Get some good gear and give it a shot.
Here is a video showing you how NOT to fight Rakanoth. I basically got lucky and that’s the only reason I beat him with this build:
Diablo Nightmare (Level 50)
By the time you get to Diablo you should have at least 3,100 dps and 15,000 health. I’d say if you have less than that to go visit the auction house and get some upgrades. They should be really cheap. Regardless of your DPS and health, the big challenge with Diablo is that she is constantly attacking you and you don’t have a way to go invincible like the Wizard does so you’ll have to run around like crazy avoiding things and getting what little damage you can in.
To overcome these challenges I recommend Impale with Chemical Burn to actually attack Diablo. I recommend Smoke Screen for the clones in the second phase to avoid taking damage that is otherwise hard to recoop. I recommend Preparation with Battle Scars as a second heal. Those abilities will give you what you need to beat Diablo but it will probably take a long time. Here is how I did it shortly after Diablo 3 was released:
Hell (Level 50-60)
Congratulations beating Nightmare, but guess what? You’re just getting started! Now that you’re in Hell difficulty I recommend that you visit the auction house in search of a new weapon before every boss (Butcher, Belilal, Azmodan and then once you’re 60). The reason being is that every level the base DPS available on a 2h crossbow, bow or hand crossbow goes up significantly. This will amount to 1,000s of DPS and give you a big advantage over whatever challenge you’re facing.
You’re also going to face more problems against rare packs and champions. I still recommend a build that involves Caltrops (with either Torturous Ground or Jagged Spikes), Vault and Preparatoin (with Battle Scars). For a damage-dealing secondary ability I still like Chakram with Razor Discs, but Impale with Chemical Burn is the highest burst damage ability (Chakram vs. Impale).
Act I (Level 50-53)
The Butcher – Hell (Level 53)
The Butcher doesn’t screw around. There are 3 primary attacks you need to avoid: 1) his grappling hook which you can avoid by watching him, when he points then you have to move out of his way. 2) his charge, this comes after he does a fire breath so it’s pretty easy to avoid and 3) his physical attacks which can be avoided by staying away from him. Vault helps tremendously when it comes to avoiding this guy and the fire beneath him. There are also two health wells you can use as extra heals (I also keep Preparation around with Battle Scars for an additional heal).
There’s no reason to use Chakram with Razor Disc here, even though I got away with it in the video below. Anything from Impale (you’ll run out of Hatred FAST – so use Justice is Served on Entangling Shot if you do) to Rapid Fire (with Fire Support or Withering Fire) will work better. If you have problems with Butcher you probably either need 1) new gear or 2) more practice. Good luck!
Act II (Level 53-56)
Belial – Hell (Level 56)
Belial is a very tactical boss that requires you to move and attack at the right time. The fight itself spans 3 phases. The first phase is just adds which are easy to take down with Caltrops Jagged Spikes and your AoE attack of choice (I use Chakram with Razor Discs). The second phase includes Belial in his “human” form. He floats around and sends these weak green things at you that don’t really hurt you. You can dance around them, keep using Caltrops, Vault a little bit and eventually kill everything. The third phase is where things get dangerous.
During the transition between the two phases I swap my build, changing Chakram to Impale with Chemical Burn. This is because during the third phase you have less time to attack which means a more Hatred intensive and high damage ability is appropriate. I also swap in Mark of Death instead of Caltrops for more damage. I’m sure there are more mods you can make to your build during this transition that I’m not thinking of.
The big challenges in the third phase are avoiding his crushing strikes. He will hit on one side, then on another side and then smash in between the first two attacks. Once you understand this pattern the third strike, which is the biggest and most dangerous, is easy to avoid. His other strikes is big too, gives a single warning and can be tough to avoid. That’s where healing potions and Preparation with Battle Scars are helpful.
You may also have problems with the meteor showers since you won’t have any way to protect yourself other than standing in the right place. It seems like every now and then there is a time when you simply can’t avoid the meteors meaning you will die. I guess just be patient and try the encounter again.
Here is how to kill belial on Hell:
Act III (Level 56-58)
Azmodan Hell (Level 58)
Azmodan is a surprisingly easy boss considering how much hype the plot puts into him. I decided to try Rapid Fire with Bombardment on my first attempt and it actually worked really well. I kept Entangling Shot with Heavy Burden to keep the adds at bay, Vault to move around the void zones, Preparation as an extra heal and Discipline source and Smoke Screen just in case. All you need to do is dodge his rain of corpses, fireballs, fire laser, adds and void zones. Pay attention to where you are at on the map otherwise you might corner yourself running from void zones.
Act IV (Level 58-60)
Finally! The last Act of Hell and the final 2 levels to 60. Once you reach level 60 you can buy all that fancy gear on the auction house and get ready for Inferno. But wait.. you still have to kill Rakanoth, Izual and Diablo…
Iksatu Hell (Level 58)
You will face Iksatu immediately when you enter the portal after talking to Tyreal. Remember to change your build before you go in or you might find yourself in trouble. Iksatu is an easy boss you should be able to one-shot. Kite him around in a circle, use Rain of Vengeance with Stampede, Vault, Caltrops with Jagged Spikes and Chakram with Razor Disc.
Rakanoth Hell (Level 58)
Rakanoth on Hell is probably the hardest boss to deal with. There is the potential that you can just get lucky fighting him since it’s a relatively short battle, but other than that you’re probably going to have problems with him. To defeat him you will need to understand how his teleport works. First, here is how you can tell when it’s coming:
Notice the white cloud appears under his model. This means it’s coming. The only way to avoid it as a Demon Hunter is with Smoke Screen. SS doesn’t have a cool down but uses 14 Discipline so I recommend making sure you keep your discipline full. you’ll also have to deal with his adds. Other crucial abilities in this encounter are Preparation with Battle Scars as a backup heal and way to get Disciplin back. Smoke Screen, obviously, to avoid the crushing teleports. A strong DPS ability, I used Bombardment, I don’t remember why but I guess it worked. Vault for getting out of range of Rakanoth’s melee.
Izual Hell (Level 59)
Izual has a few annoying abilities. First, if he gets close enough to you he will teleport on top of you and one-shot him. It’s incredibly important you stay at least half the screen away from him at all times. Second, he will stomp the ground and freeze you even if you don’t get caught by an orb. If you’re far enough away, though, you’ll be able to avoid it. Be prepared to heal yourself it his happens. His adds will also cause some annoyance.
To overcome these problems I used Rapid Fire with High Velocity to do max damage to both him and his adds at the same time. I used Caltrops to snare him and keep my distance. I used Vault to get the hell out of there when I made a mistake and Entangling Shot to slow him and his adds. I think the most crucial part of this encounter is to stay away from him.
Diablo Hell (Level 60)
Alas! The final boss of Hell. You should be level 60 at this point, if you’re not there is no point in trying to kill Diablo at level 59 since once he’s dead you’ll need to farm to level 60 to go to Inferno anyways. Diablo’s abilities are just like in the other difficulties. The biggest problem I faced was against my clones, who would either deplete all of my health or kill me outright. To overcome this I regeared for vitality. It cost me about 30-40,000 gold but I was able to come out of it with 17k dps and 40,000 hp instead of 19k dps and 25,000 hp. I also stacked health regen since the second phase was the hard area and I was limited on ways to heal myself.
As for build, I used a unique build that takes advantage of Evasive Fire, Vault and Tactical Advantage. Evasive Fire is similar to Vault except you jump backwards and it only costs 4 Discipline. With both Vault and Evasive Fire you gain a speed buff for 3 seconds from Tactical Advantage passive. I used Impale for DPS and Entangling Shot with Justice is Served for Hatred regeneration. Preparation for my backup heal, especially in phase 2, with Battle Scars. Finally, Smoke Screen with Lingering Fog to face my clone, who does a surprisingly large amount of damage.
This build allowed me to kite the crap out of Diablo while still doing suitable damage with Impale. Keep near the health globes and burn Smoke Screen when fighting your clone and you should be able to survive this with little problems. Watch your Discipline, don’t waste it all with unnecessary vaults.
Congratulations defeating Diablo on hell!
Important: Many of the strategies and tips I share here were originally inspired by the people at the Diablo 3 Gold Secrets Forum. If you're serious about making the big bucks in Diablo 3, or just being the best players, you need to signup ASAP.

Really awesome post. I’m gonna try your solo build for my level 41 DH. I needed a change.
Here’s one that I think you may have missed trying out: Elemental Arrow with Screaming Skull. EA hits pretty hard, and 40% of the time they Fear and head the other way. With some Hate management, you can handle a lot of big ugly mobs all at once, if you can keep lots of them running away from you while you wear them down. The Fear even works a bit on bosses sometime.
This even lets you tank a bit in coop, draw aggro from a few big mobs and keep peppering them with Fear and kiting, this can free up your buddies to work on the rest.
Thanks for the great post. I’ve recommended your site to all my D3 friends.
Meldora I really appreciated this guide. I played DH all through normal and geared up a little it was too easy. But then NM came along and first thing I noticed was my DPS was horrible. going normal to NM you have to change up almost everything you’ve been doing right away. Your guide was perfect to help me tweak bits I didn’t know and set me straight. Thanks a bunch for the great work.
Thanks for this great site. I used it while i played Barbarian og now for my DH
1. Smokescreen removes Jail / Freeze / Snares / CC effects while granting damage immunity (to most things). No clue why you don’t have it slotted. Jailor/Freeze does nothing to a Demon Hunter. Ever. Even post nerf its the second most overpowered ability in the game. The first is Monk Serenity, which does the same thing (Damage immunity, cc immunity, cc removal, debuff removal, but lasts longer). You cannot progress through Inferno without Smokescreen. It also has a cute interaction with Reflect damage by making it impossible to take damage while under its effects.
2. Elemental Arrow = Highest DPS/aoe (rapid fire is slightly higher without the aoe). Ball Lightning hits targets multiple times. Nether Tentacles imo is best-in-slot damage ability
EA (Ball or Tentacle) hits Belials final form ~5+ times per shot. Combined with Mark of Death- Mortal Enemy (hatred on hit), a DH can literally spam EA without using an auto attack.
Chakram is cute and really wants to be a D2 Hammer. I still can’t find a slot for it (I refuse to remove EA).
I discovered a really cheesy way to kill Diablo. I used this method on hell difficulty. All you have to is spam hungering arrow in the general direction of Diablo. By doing this you can kill Diablo from two and a half screens away. Hungering arrow functions like a guided arrow so you don’t even have to be straight on with your shots. This probably isn’t the fastest way to kill him, but it works and you literally do not have to put yourself in danger at all. The only thing you have to do is dodge his spike traps and that shouldn’t be a problem.
Thank you for the guide.
Really nice guide! but I am level 40 with 2200 damage and 12000-16000 can’t really remember at the moment I usually try to find a coop with and barbarian or monk so I can kill like a pro. But I am not sure what I should use for my attacks. I have smoke screen, preparation, umm and a skill that lets me get 30% as health from the damage I do, companion bat. not sure what to do to max it out anyone have suggestions?